Sunday, October 5, 2014

Pattern review: Oliver + s roller skate dress


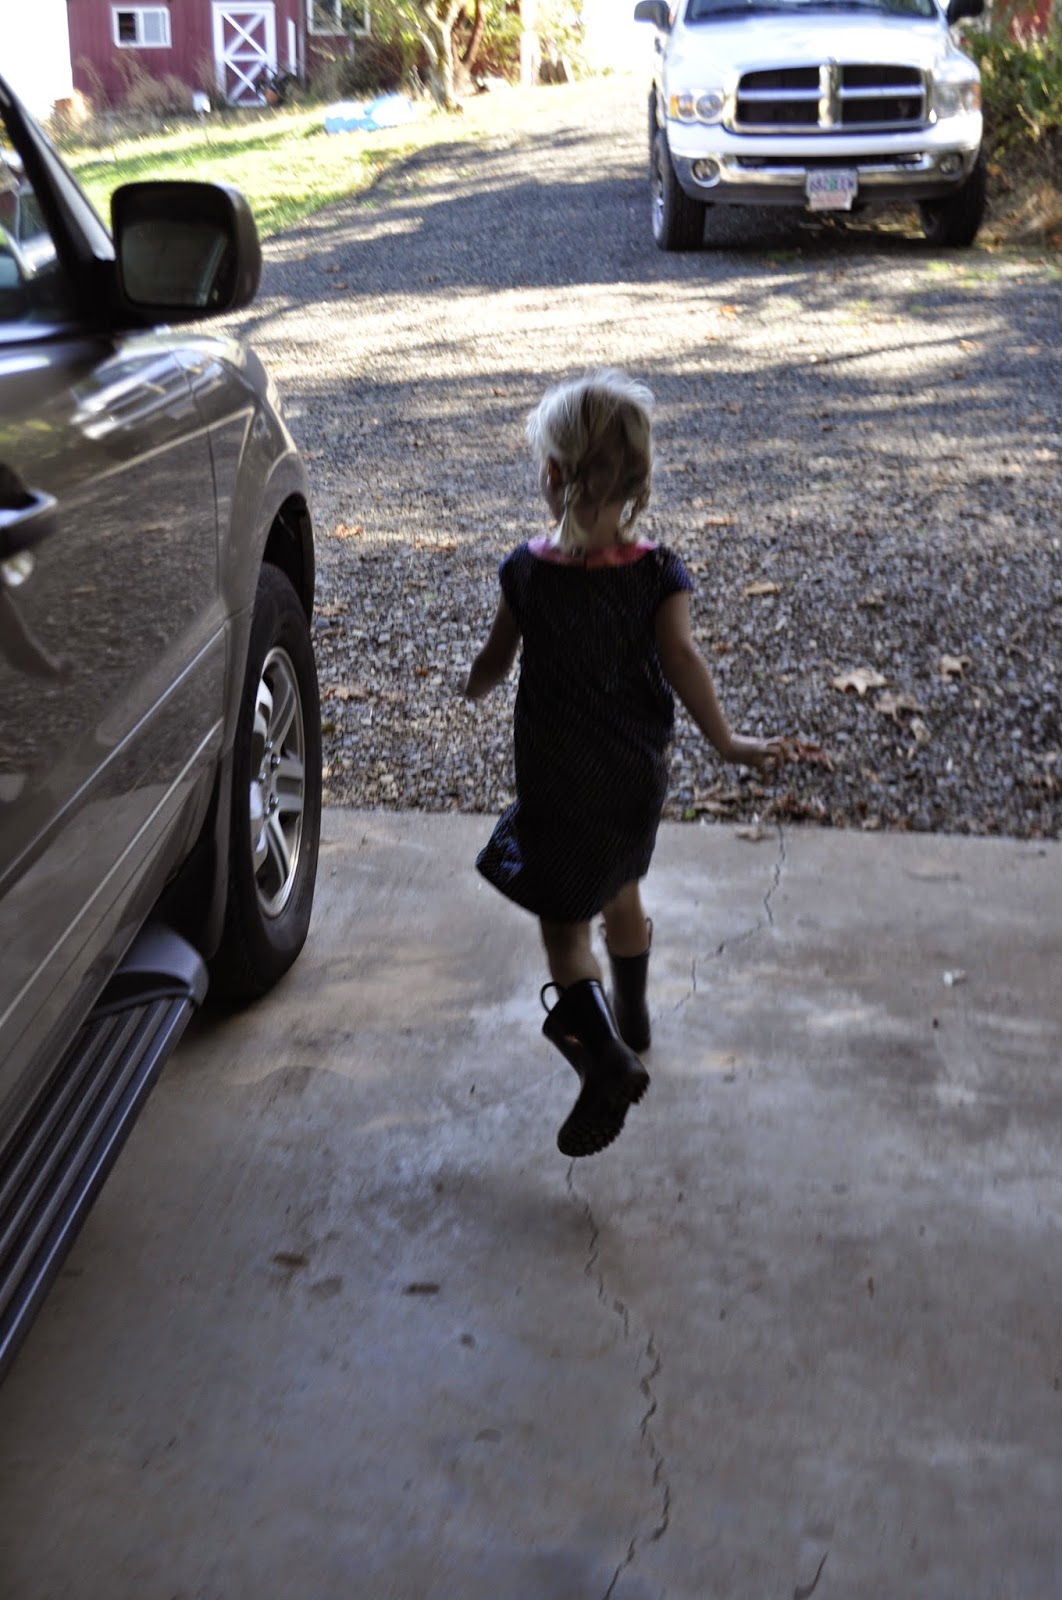
I'm trying to make most of Stella's Fall and Winter wardrobe.  I picked up a few Oliver and s patterns I'd been lusting after in a 40% off sale this summer and I've been itching to use them. I figured with a long sleeve and leggings a roller skate dress would fit right in.  But today was beautiful and sunny, so all it needed was boots!

Cute notch!


She said, "Okay, you can take a picture of me now."

So much enthusiasm. Hard to contain.

Good for playing!


PatternOliver + s Roller Skate Dress

Sizing:  I sewed a 3T in 4T length (according to the measurements) and it fits great!

Material used:   A couple of batiks from Joann's.  I don't know why this is the first time I've used a batik for a garment, love the results!

Notions needed:  A button and a scrap of interfacing (which I forgot to use and it was fine.)  I also used a hair tie instead of a strip of bias for the button loop. 

Appropriately rated:  Yep. (Rated two/four scissors.) Although with Liesl's instructions, I bet it could be a first project. 

Time spent:  Not long. I'm slow and it was just a few hours including cutting. 

Comments:  Super cute dress. And it can be reversible! (There are plans in the works for a small tunic.) As with every Oliver + s pattern I've sewn, it set the bar impossibly high for all other pattern designers and I had no problems with the instructions. 


I've linked this post over at Inspire Us Thursday at the Inspired Wren.

Thursday, October 2, 2014

Pattern review: Sally dress by very shannon


Hi there! 

So, awhile ago (over a year) I bought a Sew Fab pattern bundle.  It had a bunch of patterns and I thought I would potentially make 10 of them, so it was worth the money.  Guess how many I've sewn?  Three!  This one included.  Apparently, I should not buy pattern bundles.  However, I do have several more of the patterns printed thanks to print credits at school and a scirocco dress actually cut out.  That practically makes four.  Three and a half? 

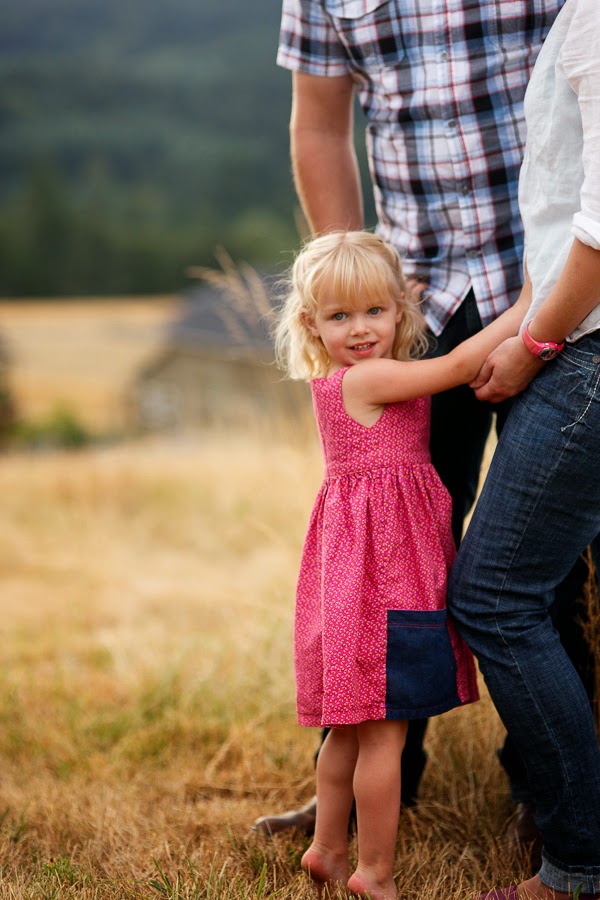
I ended up loving this dress so much that Stella wore it for family pictures with Marci (the best family photographer in the Willamette Valley), so I have awesome pictures to share!  Except, they are focused on the girlie in the dress, not the dress itself.  Now for gratuitous pictures. 


The little one would NOT cooperate with some smiles.  She was in the process of cutting five teeth in a couple weeks, so I can't blame her too much.
 
Anywho, on to the pattern review!

PatternSally Dress by Very Shannon

Sizing:  Spot on.  I sewed a 2T adding several inches in length based on the size chart and it fits just right.  I was worried the shoulders wouldn't stay on put, but they did. 

Material used:   1 yard of a quilting cotton clearance find at Joann's.  It was $2 a yard after discounts!  Sweet!  There was only a little over 2 yards on the bolt or else I would have bought way too much.  Except I couldn't have had too much of this fabric. You can't tell how amazing it is from the pictures so you'll have to trust me. For the pockets I used some scraps of chambray and hot pink shiny satin (also from JoAnn's). 

Notions needed:  None!

Appropriately rated:  It's rated advanced beginner/intermediate and I think it might be a little easier than that.  I didn't sew the sleeves, though, so maybe that's the difference. 

Time spent:  Not long.  1 1/2 short evenings and a little work in between chasing children. 

Comments:  I really like how the dress turned out.  Really cute!  And I love how quickly it slips on and off.  There aren't a lot of options in the pattern, besides for sleeves/sleeveless, but I got a great price.  I do have a couple things I'd do differently next time.  1) Prep the bodice by basting a 1/2" guideline around the armholes and the outer bodice waistline to help with pressing.  The armholes were really frustrating, and I'd basted a 1/2" guideline in advance it could have been easy.  2) Finish the bottom of the pockets.  Because of the bulk, the pockets were only turned under once on the hem.  So, the whole dress has beautifully hidden raw edges (I used French seams for the skirt, a first for me) except for the pockets.  Oh well. 

The pattern was fun and different.  The directions were clear and pretty complete.  With adding in the basting, I'd recommend it. 

Sunday, August 17, 2014

Pattern review: Fancy pants leggings


(Words at the bottom.)


Cute bum panel elevates the leggings to fancy pants.  Seriously, it's cute.

Hem by turning up and zigzagging.


Hem with a cuff.

So stinkin' cute.

Unhemmed and rolled for growing room.


PatternFancy pants leggings by Titchy Threads.  I got it as part of a Sew Fab pattern bundle a looong while ago.  Finally got up the guts to try it.  (I'm still a little afraid of knits, but this pattern helped build some confidence.)

Sizing:  The pattern goes from 0-3 months - 10 years.  I made the 3-6 month size (twice) and the 3T with the skinny legs width adjustment and extra length. 

Material used:  Some stretchy knit denim I bought even longer ago at Joann's.  It has spandex in it for good recovery and was pretty nice to sew with.  Unfortunately, it snags a little. 

Notions needed:  None, although you could put elastic in the waistband for extra staying power. 

Appropriately rated:  Yes.  Rated confident beginner and I think that's because of sewing with knits.  With a stable knit fabric anyone could make these.  They were easy and fast and now I want to make all the girls leggings.

Time spent:  An hour including cutting.  Fast!

Caveats:  The waistband didn't have a width adjustment line on it like the leg piece (and I forgot to adjust it), and since the material was so stretchy I really needed to make the adjustment.  They have a tendency to slide down.  I also could have put elastic in the waistband (one of the recommended options).  Another problem I had was the crotch blew out of the first pair the second time Stella wore them.  So, I shortened and widened my zig zag stitch so the thread wouldn't break and reinforced the crotch.  I didn't topstitch the butt seams, but that would have reinforced them as well. 

Comments:  Loved the pattern!  Instructions were complete and easy to follow.  Now I'm itching to make the skinny jeans from Titchy Threads. 


Thursday, June 26, 2014

Pattern review: Oliver + s fairy tale dress

If you've read many of my posts, you might see a theme.  But if it's not broke, why fix it?  So, I took advantage of the 40% off Black Friday sale (or maybe it was 50% off, I don't remember) and bought every Oliver + s pattern I thought I would sew.  Yep. That was November of 2013.  I sewed up the first fairy tale dress in December (I have plans and fabric for the girls' Christmas dresses for next year) and I've never been so proud of something I've made.  It is beautiful, a perfectly fitting, fully lined, complete with crinoline dress.  Stella was just getting into "tutus" when I made this and this one has three! (The lining, tulle and dress.) The best compliment came when I overheard my Grandma (who has sewn a lot of little girl dresses) tell my Aunt (who also sews) that it wasn't handmade, and I got to pipe in and say, "I made that!"

Best feeling ever. 

And it's held up through a ton of washings (since I'm posting this in June and she wears it almost weekly).  Sadly, there hasn't been any in focus documentation of the fairy tale dress.  Aside for these grainy, poor lighting, bad hair, end of the day pics.  Oh well, you get to meet the dog.  Her name's Blue. 


(Check out the adorable sleeves!  One of my favorite parts of the pattern.)
 
Maybe I'll take some real photos and replace these.  Don't hold your breath.  Down to the nuts and bolts:

PatternOliver + s fairy tale dress

Size I sewed:  Size 2T width/ 3T length (I went according to the size chart)

Material used:  Quilting cottons from Joann's, tulle for crinoline. 

Notions needed:  An invisible zipper.

Appropriately rated:  Intermediate.  Appropriately rated, but as long as the sewist has made a few other projects Liesl describes all steps clearly.  The invisible zipper was a cinch with her instructions.

Time spent:  A lot.  Like, many evenings, naptimes and a car ride to finish the handwork (but, I'm pretty slow).  It's a very involved dress with lots of pieces to cut out and many, many steps.  Plus, the lining is handsewn to the zipper to finish the dress and the hem looks really nice when done by hand.  The result is only possible because of the effort and it's worth it. 

Comments:  It was intimidating to start this project after reading through the directions.  But I trust Oliver + s patterns, so I just kept following the directions and plugging away and really liked the end result (a lot, can you tell?).  The only part I didn't love was the tube sewn to the waist.  Mine didn't ever get very tube-like and I probably shouldn't have sewn it on at that point.  It is a nice touch on the dress, but the pale pink fabric I used was kind of thin and cheap and just didn't hold it's shape very well. 

If you're looking for an amazing fancy dress pattern, this is it!  I would 100% recommend it. 

Monday, April 14, 2014

Flip this Pattern: Heidi & Finn Colorblock Dress

I sewed this up as part of the francessuzanne Flip this Pattern Sew-Along.  It's the first one I've joined in the series.  Flipping a pattern makes me a little nervous -- I still feel like too much of a novice to change a pattern very much the first time through.  When I saw this pattern, my first thought was to make it out of knit and reversible -- that seemed like a wild enough flip for my skills.  Stella needs more everyday dresses since she often insists on wearing a "tutu".  But, I didn't have enough coordinating knit fabric on hand, and what I did have seemed like it would be a bit heavy doubled up.   I ended up sewing the shoulders in a woven solid, and the rest in a knit.  I've only sewn a few things out of knit, so I sewed carefully.  It turned out great! 


No close ups of the dress (and smartphone pics) and I learned my lesson about counting on a toddler for holding still for a half second or cooperating when I'd like to do her hair...


Stella picked out the cupcake button :) 


Only modification was only lining the bodice of the dress to keep it lightweight.


Curious about the dirt patch Stella was running around in?  Our future firepit!  We bought the supplies today and we're hoping to get it done next week.  So excited for backyard s'mores!


More about the pattern:

Pattern:  Heidi & Finn Colorblock Dress  

Sizing:  I sewed a 3T in a 4T length knowing it would be a bit big (room to grow!) and it fit fairly well.  The pattern didn't have a sizing chart, just finished garment sizes, but I messaged through etsy and got a quick response from the pattern makers. 

Material used:  Kona solid for shoulders and jersey blend knit from Joann's that had been in the stash for awhile.

Notions needed:  A button. 

Appropriately rated:  Yes.  A beginner pattern, although more markings on the pattern would be appreciated.

Time spent:  Only a few hours including cutting out. 

Comments: This was the first Heidi & Finn pattern I've sewn and I was impressed.  She has a lot of patterns, and I'm looking forward to making the jacket pattern I also bought.  The only grievances I had were that the pattern lacked any notches that would have been helpful when putting the dress together, and I couldn't figure out the middle back seam (steps 38-39) so I just sewed two seams instead of 1 and it worked fine.  I think I'll use this pattern again and  I would recommend it.

Sunday, October 6, 2013

Pattern review: McCall's 6781

Joann's had a super sale on patterns.  75 cents each for Mccalls patterns!  Wow!  I am not a big fan of them, because they're always a bit like reading a foreign language and you can't just follow them step by step, but for that price I folded.  Plus, I had some really cute corduroy in my stash that was begging to be used.  I sewed up a tunic in a size 2 with a little extra length (although I had to shorten the sleeves a little). 


Here are some more details on the pattern: 

Pattern:  McCall's 6781.  I sewed up view c. 

Size I sewed:  Size 2, but added an inch in length, and shortened the sleeves slightly.  Still a little big even though the size chart said I should sew a 2. 

Material used:  Corduroy from Joann's (Maybe part of their doodles collection?  I think I've seen it there lately) and muslin for the contrast (bad choice there, but it was in my stash and it worked). 

Notions needed:  A zipper, and I added buttons on the front for cuteness. 

Appropriately rated:  No.  It said it was easy, but the pattern called for a lot of handsewing, and it had a zipper with very little explanation of how to put it in.  Maybe I'm just annoyed because it was my first zipper and it didn't turn out very well, but I wouldn't call it easy.  Certainly not fast. 

Time to make it:  Including cutting it out, it probably took 8 hours altogether, but I'm pretty slow. 

 Comments:  I swear, whoever wrote the pattern didn't actually sew it.  I think I'll sew it again, but I'll sew the one with the square neck, and use a smaller seam allowance in order to make sewing on the sleeves a little easier.  The pattern doesn't mention that the sleeves need to be gathered a little in order to fit (maybe that was my fault, though).   For the price, I would recommend it with reservations, but not to a beginner. 


Hope this helps!  Happy sewing!


Sunday, September 29, 2013

Pattern review: Oliver + s ice cream social dress and tunic

So, the little girl needed a new dress to wear to Aunt Roommate and Uncle Tom's wedding.  Right?  And I really wanted to make one because I'm crazy and didn't have anything else to do.  Haha.  I looked through my patterns and decided to finally try one of the Oliver + s patterns I picked up on clearance at Creative Crafts last year.  They were only $4.50 each (normally around $15)!  I'm kicking myself for not buying more, but oh well.  I only had the larger sizes pattern, so I guessed on sizing it down to around a 2T, and made a tunic to check the sizing first.  I love, love, love the tunic.  I used some leftover fabric of some dresses and bloomers I made last year, and it is really adorable with some jeggings.  Little girl will wear this one a lot she looks so darn cute in it.  I adjusted the pattern a little with the dress, and tried color-blocking with a couple Kona solids (tangerine and pomegranate maybe?) and a print I got from Joann's.  I had made some bloomers last year out of the same pink, so we lucked out there.  Little girl loved her dress!  She calls it her "aunt roommate uncle tom wedding dress".  Bit of a mouthful.  I wish I had pictures of the little girl wearing the dress, but I don't think it would ever get blogged about if I waited for that.  Plus, it gets a few more berry and watermelon stains on them every time she wears it...


Stella wore the tunic in family pictures (the day before Charlotte was born), so I have some terrific photos of it.  We love Marci for family photos.  She can get real smiles and personality out of kids like no one's business.  And she has a fun blog.  Here's a few photos from that session:


Oh, the cuteness.  It's a bit overwhelming at times. 


Here are some more details on the pattern: 

Pattern:  Oliver + s ice cream dress sizes 5-12.  Blouse and dress with a button and loop closure and sweet v-notched neck. 

Size I sewed:  About a size 2

Material used:  Fabrics from my stash for the blouse and from Joann's for the dress (sorry, I don't remember what the dress print was called.)

Notions needed:  A button. 

Appropriately rated:  Rated advanced beginner, but I had no trouble at all with it, and I would consider myself a beginner. 

Comments: This was the first Oliver + s pattern I made and I've fallen in love!  I felt like I could learn how to sew from this pattern.  It turned out terrific, and I learned a few techniques from it that I'll apply in other projects.  I'd only sewed with Butterick and McCall patterns up to this point, and it felt like angels were singing the whole time I was sewing.   I would definitely recommend this pattern!