Wednesday, December 31, 2014

2015 sewing goals and a 2014 recap

Sooo... it's that time of year to make New Year's resolutions and I'm just not feeling the whole lose weight/get in shape goals I often make. Sewing resolutions? Totally feeling it. During 2014 I accomplished some informal goals I had of sewing with knits, a swimsuit, outerwear, using more of the patterns I already own and sewing more in general. I also tried to sew for myself three times and failed. Three times. Bahh.
 

Goals for 2015:

(In general, goals should be realistic, specific and measurable, so here goes)

- Make 50% of the girls' clothing
- Make more clothes for myself (specifically, workout leggings and a chambray shirtdress)
- Learn to use the serger

These are more like guidelines:
- Use patterns I already own or free patterns when possible
- Try to use fabric stash first (use two fabrics from stash for every new fabric purchased)
- Explore fabrics beyond quilting cotton


2014 Recap:
 
So what was my favorite item I sewed this past year?
 
Maybe this (blogged about here):


Nituna Jacket
 Or this Bimaa (never blogged but well loved):


Or this Nantucket one-piece by peek-a-boo patterns (a swimsuit! Also never blogged about and then it died a gritty death thanks to a dirty lake):


 Or maybe this backpack from the Oliver + s Little things to sew book:


What was Stella's favorite? I didn't ask her because she's asleep, but I'm guessing she'd say this incredibly ridiculous dress (Seriously? What was I thinking. Just because you might think every little girl needs a rainbow dress, doesn't mean every little girl needs a rainbow dress.):


Party dress free pattern by the Cottage Mama

 Or maybe this dress, which was also the most challenging thing I made this year:


Modified fairy tale dress by Oliver + s
 
Most worn item?
 
While it's shaping up to be the nituna jacket at the top of the post, this skirt was worn a TON. I think it's because a skirt usually gets pulled on over pants whenever Stella gets the opportunity and this one was marketed to her as pirate-esque. Thanks to Jake and the Neverland Pirates, we went through a big pirate phase this year. I was totally okay with it, because I love this skirt. It was such a happy sew. I made it for Stella to wear for Mother's Day and the colors remind me of Guatemala.


 This is also worn a lot by the little one. It's the perfect weight for chilly winter days.

Lullaby layette jacket and happy Charlotte
 

So what are your sewing (or non-sewing) goals for 2015?


Thursday, December 18, 2014

Pattern review: Nituna Jacket by Figgy's

Wow! There were a lot of firsts with this project. First time sewing with a sweatshirt knit, first outerwear and ... wait for it ... first welt pockets!


And it fits, and it looks stinkin' adorable. Seriously, she wore this with skinny jeans and boot the other day and I loved it even more. It has a really nice swing shape and just the right length. I like it more and more every time she wears it.

Oh yeah, and the girlie likes it, too. She's still in a wonderful phase where she likes clothing just because I've made it and wants to tell everyone she meets that momma made her dress/shirt/skirt/COAT. Which is awesome, except when she wears the crazy rainbow dress I made her and tells everyone I made it. Then I cringe a little.

Here's the deets on the pattern:

PatternNituna Jacket by Figgy's

Sizing: Measurements fell right in between sizes so I cut between the 2/3 and 4/5 lines and added about an inch in length and it fits just a tad big (I'm okay with that).

Material used: Gray sweatshirt fleece, navy kona, green polka dots and a calico classic all from Joann's.

Notions needed: Four buttons. I was supposed to interface the front placket, but I added a sweatshirt knit lining to the front placket instead. I didn't really want the lining to show if the placket fell open since most of Stella's wardrobe is pink and would clash.

Appropriately rated: I don't think there's a rating. Aside for the welt pockets, I real like an advanced beginner could handle it. The directions are a little sparse, but pictures help.

Time spent: I cut it out a couple months ago, and then spent weeks thinking about how to construct the welt pockets until I had time to tackle them. Once I actually started sewing, it went pretty fast for a jacket. Maybe a week's worth of shorter evenings?

Comments: The hood turned out a little weird as seen in the pictures above. The directions for the welt pockets were laughable. Plus, looking through an Oliver + s tutorial (written by Kristen from skirt as top) showed a backing piece that the pattern didn't have, so I cut one out and didn't look at the directions in the pattern again. Aside for the Oliver + s tutorial, I studied a welt pocket on a jacket I own.

I like the jacket more and more every time she wears it and can see making this pattern up again. I'm glad it goes up to an 8/9 because this would be really cute on an older girl, too.


This post is linked up over at Straightgrain's sew + show.

Wednesday, December 10, 2014

Pattern review: Every little thing dress by Shwin Designs

Well, my model is less then cooperative. But that's old news. It's hard for my little girls to hold still. And hairdos? I save that battle for Sundays. But she loves this dress, and I love this dress, so at least we agree on something.


You probably can't tell from the amazing pictures, but the snaps are heart shaped. Which I love.


I love this plaid. It's perfect. The purple, blue and pink are almost too '80's, then it hits you with the black and orange (happy little sigh). It must be a poly/cotton blend because it doesn't wrinkle, either. I think I have enough left over to use as a back yoke for something if I ever actually use any of the patterns I've been accumulating for myself (frustrated sigh).

In other news, I finished my last nursing theory course today and all I have left is an integrative practicum January - June. Woohoo! I'm getting so close to being a nurse!


PatternEvery little thing dress by Shwin Designs

Sizing: I think I sewed up a four. I couldn't find a size chart anywhere in the pattern, so I went with what Stella wears in ready to wear and added length just to be safe. It should fit for a couple years :)

Material used: Robert kaufman chambray stretch linen in black (I think) from Pink Chalk fabrics' liquidating sale and the most amazing plaid ever upcycled from a Mexico skirt (aka a skirt I bought from Goodwill to wear in Mexico during a missions trip back in high school. I might have fabric hoarding tendencies.)
 
Notions needed: Three snap sets from here. Aren't they cute? The pattern calls for buttons, but snaps are just so much quicker.

Appropriately rated: Yes. Rated advanced beginner because of buttonholes, and instructions are a little hard to read at times. If the instructions were rewritten, it could easily be appropriate for a beginner.

Modifications: I left the bow off and have her wear it with the snaps in the front (the front and back bodice pieces are the same except for the button placket). I also added a couple inches width to the skirt to make it nice and twirly and doubled the width of the skirt band to add growing room.

Time spent: A long evening covered both cutting and sewing.

Comments: I think the pattern is one of Shwin Designs' earlier releases. I haven't tried any other of their patterns, so I don't know if they've improved. The instructions in the pattern are written in the same style of the blog, so if you like the tutorials and free patterns on the blog, then you'd probably do fine with the instructions. The photos are helpful, but the written instructions lack clarity and good sentence structure. That said, the pattern is perfect for a simple, cute, quick jumper and the pockets are awesome. This is actually the fourth time I've made it (a tunic for Stella last year and two dresses for nieces -- none blogged), so I must like it!

Linked up at sew + show at straightgrain. (Look! I figured out how to add a button! Thank you google.)


Thursday, November 27, 2014

Pattern review: Oliver + s lullaby layette jacket


Another Oliver + s pattern review. What can I say, if it ain't broke, don't fix it. The lullaby layette set has this jacket, a pair of pants, a bodysuit and a shirt. And it's equally cute on boys or girls as a whole bunch of bloggers proved when the pattern first came out.

I made the jacket along with the free baby leggings pattern from go to patterns for my newest niece. When it was passed around at the baby shower my aunt gave me an A+ (and that's a big deal because she used to teach home economics). Woohoo! It was so adorable that I made a second jacket to match for Charlotte to wear this winter in a 12-18 month size.  
Pink and white strips on the reverse. Oh, it's reversible, by the way.


I added this little detail to the leggings. It was inspired on pinterest by this, and it added a nice touch that made it into an outfit. I made the leggings from this ponte de roma from Girl Charlee. Sewing with this stuff is awesome and it has great recovery, but some leggings I made for Stella from it have pilled from the dryer (you're not actually supposed to dry it. Says it right on the website and I chose to roll the dice. Wah wah waaaaah).
 

And here's Char in her jacket. It's the perfect weight for our mild winters.


I didn't really need to adjust the pattern or the instructions for sewing the jacket out of a knit instead of a woven, but my pink flowered knit didn't have much stretch. On the second jacket, I interfaced both pieces for added stability under the snaps. Here's a tip for sewing on the bias tape that I meant to apply to the second jacket but forgot: In the first step of sewing the bias tape onto the jacket outer use bobbin thread that matches the jacket lining. Mine had quite a contrast, and while theoretically it should be covered by the bias tape when it's wrapped around to the lining, the bias tape could be peeled back and expose the seam. Hope that makes sense!


In other news, these girls are becoming friends! And, the little one can now climb onto the dining chairs and the piano bench at my mom's house.


And then this happens and I'm reminded that they aren't good friends yet. Sigh. (And yes, she did push her sister off the bench with her elbow.)


PatternOliver + s Lullaby Layette Jacket

Sizing: I made a 3-6 month for the niece (pictured) and a 12-18 month for Charlotte. I can't speak about how the little one fits yet, but Charlotte looks pretty sweet in hers! Although the flowered knit I used didn't stretch very much, if I make it again in knit, I might slim down the body a little.

Material used: All from Joanns. Pink flowered (100% cotton so not much recovery) is really soft with a nice weight and isn't piling in the wash. Pink striped was a red tag clearance buy a while ago and has some spandex in it. It is piling a little, but not bad. Kona navy woven for bias tape.
 
Notions needed: Three snap sets (I used kamsnaps, which I love because they are so easy to put in and look nice. I've also used sew ins and snap pliers with metal snaps before, but kamsnaps are by far my favorite. I bought mine here). On the second jacket I interfaced both the outer and lining pieces (the pattern only has you interface one of the pieces) because it seemed like it needed it. The snaps started out pretty sticky, but are getting less so with use.

Appropriately rated: Yes. Rated advanced beginner, and instructions are terrific and up to par with other Oliver + s patterns I've tried.

Time spent: Pretty quick! Just a few evenings and quicker the second time. It could have been faster if I didn't make my own bias tape. Sigh. It just feels so much nicer than the premade stuff and it was going to be rubbing on baby necks.

Comments: I love how this turned out! It looks so cute and it's reversible. So. stinking. cute. I'm looking forward to making up the bodysuit and shirt before Char grows out the size range, and the pieces work for little boys and girls so this pattern set is going to get a lot of mileage.

I've linked up this post at Straight Grain's Sew and Show. I've no idea how to add the button.

Sunday, October 5, 2014

Pattern review: Oliver + s roller skate dress


I'm trying to make most of Stella's Fall and Winter wardrobe.  I picked up a few Oliver and s patterns I'd been lusting after in a 40% off sale this summer and I've been itching to use them. I figured with a long sleeve and leggings a roller skate dress would fit right in.  But today was beautiful and sunny, so all it needed was boots!

Cute notch!


She said, "Okay, you can take a picture of me now."

So much enthusiasm. Hard to contain.

Good for playing!


PatternOliver + s Roller Skate Dress

Sizing:  I sewed a 3T in 4T length (according to the measurements) and it fits great!

Material used:   A couple of batiks from Joann's.  I don't know why this is the first time I've used a batik for a garment, love the results!

Notions needed:  A button and a scrap of interfacing (which I forgot to use and it was fine.)  I also used a hair tie instead of a strip of bias for the button loop. 

Appropriately rated:  Yep. (Rated two/four scissors.) Although with Liesl's instructions, I bet it could be a first project. 

Time spent:  Not long. I'm slow and it was just a few hours including cutting. 

Comments:  Super cute dress. And it can be reversible! (There are plans in the works for a small tunic.) As with every Oliver + s pattern I've sewn, it set the bar impossibly high for all other pattern designers and I had no problems with the instructions. 


I've linked this post over at Inspire Us Thursday at the Inspired Wren.

Thursday, October 2, 2014

Pattern review: Sally dress by very shannon


Hi there! 

So, awhile ago (over a year) I bought a Sew Fab pattern bundle.  It had a bunch of patterns and I thought I would potentially make 10 of them, so it was worth the money.  Guess how many I've sewn?  Three!  This one included.  Apparently, I should not buy pattern bundles.  However, I do have several more of the patterns printed thanks to print credits at school and a scirocco dress actually cut out.  That practically makes four.  Three and a half? 

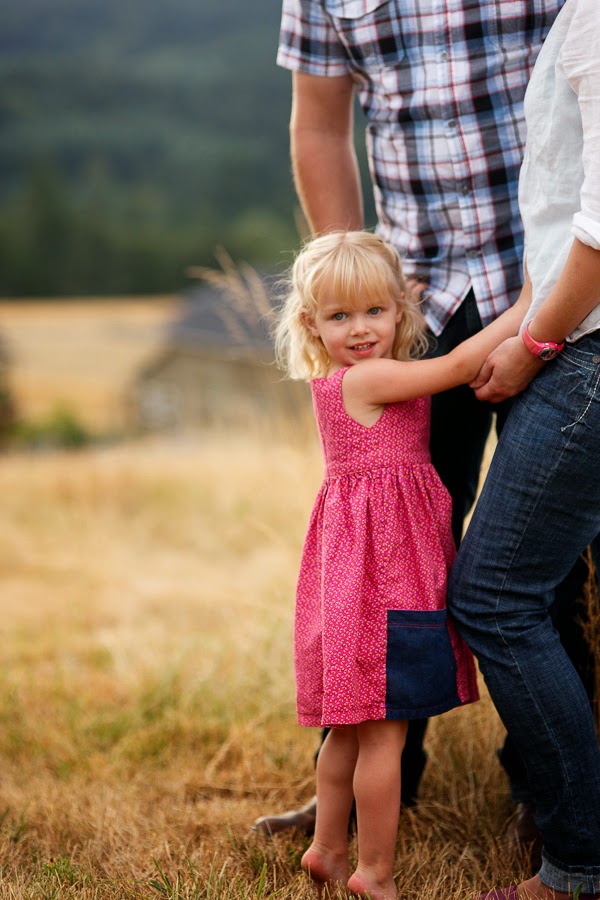
I ended up loving this dress so much that Stella wore it for family pictures with Marci (the best family photographer in the Willamette Valley), so I have awesome pictures to share!  Except, they are focused on the girlie in the dress, not the dress itself.  Now for gratuitous pictures. 


The little one would NOT cooperate with some smiles.  She was in the process of cutting five teeth in a couple weeks, so I can't blame her too much.
 
Anywho, on to the pattern review!

PatternSally Dress by Very Shannon

Sizing:  Spot on.  I sewed a 2T adding several inches in length based on the size chart and it fits just right.  I was worried the shoulders wouldn't stay on put, but they did. 

Material used:   1 yard of a quilting cotton clearance find at Joann's.  It was $2 a yard after discounts!  Sweet!  There was only a little over 2 yards on the bolt or else I would have bought way too much.  Except I couldn't have had too much of this fabric. You can't tell how amazing it is from the pictures so you'll have to trust me. For the pockets I used some scraps of chambray and hot pink shiny satin (also from JoAnn's). 

Notions needed:  None!

Appropriately rated:  It's rated advanced beginner/intermediate and I think it might be a little easier than that.  I didn't sew the sleeves, though, so maybe that's the difference. 

Time spent:  Not long.  1 1/2 short evenings and a little work in between chasing children. 

Comments:  I really like how the dress turned out.  Really cute!  And I love how quickly it slips on and off.  There aren't a lot of options in the pattern, besides for sleeves/sleeveless, but I got a great price.  I do have a couple things I'd do differently next time.  1) Prep the bodice by basting a 1/2" guideline around the armholes and the outer bodice waistline to help with pressing.  The armholes were really frustrating, and I'd basted a 1/2" guideline in advance it could have been easy.  2) Finish the bottom of the pockets.  Because of the bulk, the pockets were only turned under once on the hem.  So, the whole dress has beautifully hidden raw edges (I used French seams for the skirt, a first for me) except for the pockets.  Oh well. 
The pattern was fun and different.  The directions were clear and pretty complete.  With adding in the basting, I'd recommend it. 

Sunday, August 17, 2014

Pattern review: Fancy pants leggings


(Words at the bottom.)


Cute bum panel elevates the leggings to fancy pants.  Seriously, it's cute.

Hem by turning up and zigzagging.


Hem with a cuff.

So stinkin' cute.

Unhemmed and rolled for growing room.


PatternFancy pants leggings by Titchy Threads.  I got it as part of a Sew Fab pattern bundle a looong while ago.  Finally got up the guts to try it.  (I'm still a little afraid of knits, but this pattern helped build some confidence.)

Sizing:  The pattern goes from 0-3 months - 10 years.  I made the 3-6 month size (twice) and the 3T with the skinny legs width adjustment and extra length. 

Material used:  Some stretchy knit denim I bought even longer ago at Joann's.  It has spandex in it for good recovery and was pretty nice to sew with.  Unfortunately, it snags a little. 

Notions needed:  None, although you could put elastic in the waistband for extra staying power. 

Appropriately rated:  Yes.  Rated confident beginner and I think that's because of sewing with knits.  With a stable knit fabric anyone could make these.  They were easy and fast and now I want to make all the girls leggings.

Time spent:  An hour including cutting.  Fast!

Caveats:  The waistband didn't have a width adjustment line on it like the leg piece (and I forgot to adjust it), and since the material was so stretchy I really needed to make the adjustment.  They have a tendency to slide down.  I also could have put elastic in the waistband (one of the recommended options).  Another problem I had was the crotch blew out of the first pair the second time Stella wore them.  So, I shortened and widened my zig zag stitch so the thread wouldn't break and reinforced the crotch.  I didn't topstitch the butt seams, but that would have reinforced them as well. 

Comments:  Loved the pattern!  Instructions were complete and easy to follow.  Now I'm itching to make the skinny jeans from Titchy Threads.